Showing posts with label Windows. Show all posts

Memunculkan Panel Rahasia Di Windows 7 , "God Mode"

Hacker-Terminal | Ini adalah cara untuk membuka panel rahasia di Windows 7 , Gunanya untuk membuka Panel - panel konfigurasi dalam satu Folder .
 
1
 
 
1. Buat folder baru (klik kanan dan klik pada "New Folder"). Klik kanan pada folder dan klik pada nama, copy dan paste ini:

GodMode. {ED7BA470-8E54-465E-825C-99712043E01C}
 
How to enable Windows 7 Godmode
 
2. Folder ini sekarang akan menjadi ShortCut ke  7 godmode.


Specific Godmode Codes

 
Example: Godmode.{00C6D95F-329C-409a-81D7-C46C66EA7F33}

Print Godmode List

This is going to be a complete list of all Windows 7 functions that you can access via the godmode. I recommend to print it.
[print_link]

Action Center

Change Customer Experience Improvement Program settings
Change User Account Control setting
Check security status
Choose how to check for solutions
Choose how to report problems
Fix problems with your computer
Restore your computer to an earlier time
Review your computer’s status and resolve issues
View all problem reports
View messages about your computer
View recommended actions to keep Windows running smoothly
View reliability history
View solutions to problems
View the Microsoft error reporting privacy statement online

Administrative Tools

Create and format hard disk partitions
Defragment your hard drive
Diagnose your computer’s memory problems
Edit group policy
How to add new hardware
Schedule tasks
Set up data sources (ODBC)
Set up iSCSI initiator
View event logs
View local services

AutoPlay

Change default settings for media or devices
Play CD’s or other media automatically
Start ot stop using autoplay for all media and devices

Backup and Restore

Back up your computer
Restore data, files, or computer from backup

BitLocker Drive Encryption

manage BitLocker
Protect your computer by encrypting data on your disk

Color Management

Change advanced color management settings for display, scanners, and printers

Credential Manager

Manage Windows credential

Date and Time

Add clocks for different time zones
Automatically adjust for daylight saving time
Change the time zone
Set the time and date

Default Program

Make a file type always open in a specific program
Set your default programs

Desktop Gadgets

Add gadgets to the desktop
Add the Clock gadget to the desktop
Get more gadgets online Restore desktop gadgets installed with Windows
Uninstall a gadget
View list of running gadgets

Device Manager

Update device drivers

Devices and Printers

Add a device
Add a printer
Change default printer
Change device installation settings
Device Manager
Scan a document or picture
Set up USB game controllers
View devices and printers
View scanners and cameras

Display

Adjust ClearType text
Adjust screen resolution
Calibrate display color
Change display settings
Change screen orientation
Connect to a projector
Connect to an external display
How to correct monitor flicker (refresh rate)
Make text and other items larger or smaller
Set up computer to use multiple monitors
View the name of the video card

Ease of Access Center

Accomodate learning abilities
Accomodate low vision
Change how your keyboard works
Change how your mouse works
Change the Narrator voice
Control the computer without the mouse or keyboard
Hear a tone when keys are pressed
Hear text read aloud with Narrator
Ignore repeated keystrokes using FilterKeys
Let Windows suggest Ease of Access settings
Magnify portions of the screen using Magnifier
Move the pointer with the keypad using MouseKeys
Optimize for blindness
Optimize visual display
Press key combinations one at a time
Replace sounds with visual cues
Turn High Contrast on or off
Turn Magnifier on or off
Turn off automatic window arrangement
Turn off background images
Turn off unnecessary animations
Turn on easy access keys
Turn On-Screen keyboard on or off
Use audio description for video
Use screen reader
View current accessibility settings

Folder Options

Change search options for files and folders
Change the file type associated with a file extension
Show hidden files and folders
Show or hide file extensions
Specify single- or double-click to open

Fonts

Change Font Settings
Preview, delete, or show and hide fonts
View installed fonts

Getting Started

Find out what’s new in Windows 7
Go online to find out what’s new in Windows 7
Go online to get Windows Live Essentials
Transfer files from another computer

HomeGroup

Choose homegroup and sharing options
Share printers

Indexing Options

Change how WIndows searches

Internet Options

Block or allows third-party cookies
Change security settings
Change temporary Internet file settings
Configure proxy server
Delete cookies or temporary files
Enable or disable session cookies

Keyboard

Change cursor blink rate
Check keyboard status

Location and Other Sensors

Enable location and other sensors
Enter a default location
View location activity

Mouse

Change how the mouse pointer looks
Change how the mouse pointer looks when it’s moving
Change mouse click settings
Change mouse settings
Change mouse wheel settings
Change the mouse pointer display or speed
Customize the mouse buttons
Make it easier to see the mouse pointer

Network and Sharing Center

Add a wireless device to the network
Change People Near Me settings
Connect to a network
Identify and repaid network problems
Manage advanced sharing settings
Manage saved networks
Manage wireless networks
Media streaming options
Set up a connection or network
Set up a dial-up connection
Set up a virtual private network (VPS) connection
Set up an ad hoc (computer-to-computer) network
Sign in or out of People NEar Me
View network computers and devices
View network connections
View network status and tasks

Notification Area Icons

Customize icons on the taskbar
Remove icons from notification area (system tray) on the desktop
SHow or hide clock icon on the taskbar
Show or hide inactive icons on the taskbar
Show or hide the notification area on the taskbar
Show or hide volume (speaker) icon on the taskbar

Parental Controls

Set up parental controls for any user

Performance Information and Tools

Check the WIndows Experience Index
Free up disk space by deleting unnecessary files
Learn how to use your storage device to speed up your computer
Use tools to improve peformance

Personalization

Change desktop background
Change screen saver
Change the theme
Change window colors and metrics
CHange windows glass colors
Enable or disable transparent glass on windows
Get more themes online
Lock the computer when I leave it alone for a period of time
Personalize your computer
Set screen saver password
Show or hide common icons on the desktop
Turn screen saver on or off

Phone and Mode

Set up dialing rules

Power Options

Change power-saving settings
Change what the power buttons do
Change when the computer sleeps
Choose a power plan
Choose when to turn off display
Edit power plan
Require a password when the computer wakes

Programs and Features

Add or remove programs
Change or remove a program
How to install a program
Run programs made for previous versions of Windows
Show which programs are installed on your computer
Turn Windows features on or off
Uninstall a program
View installed updates

Recovery

Restore your computer or reinstall Windows

Region and Language

Change display language
Change keyboards or other input methods
Change location
Change the date, time , or number format
Change the languages used for partially translated menus and dialogs
Change the way currency is displayed
Change the way dates and lists are displayed
Change the way measurements are displayed
Change the way time is displayed
Install or uninstall display languages

RemoteApp and Desktop Connections

Set up a new connection with RemoteApp and Desktop Connections

Sound

Adjust system volume
Change sound card settings
Change system sounds
Manage audio devices

Speech Recognition

Change text to speech settings
Set up a microphone
Start speech recognition

Sync Center

Encrypt your offline files
Manage disk space used by your offline files
Manage offline files
Resolve sync conflicts
Sync with other computers, mobile devices or network folders
View sync results

System

Activate Windows
Adjust the appearance and performance of Windows
Allow remote access to your computer
Allow Remote Assistance invitations to be sent from this computer
Change workgroup name
Check processor speed
Configure advanced user profile properties
Create a restore point
Device Manager
Edit environment variables for your account
Edit the system environment variables
How to change the size of virtual memory
Join a domain
Rename this computer
Restore system files and settings from a restore point
See the name of this computer
Select users who can use remote desktop
Show how much RAM is on this computer
Show which operating system your computer is running
Show which workgroup this computer is on
View advanced system settings
View running processes with Task Manager

Taskbar and Start Menu

Auto-hide the taskbar
Customize the Start menu
Customize the taskbar
Find missing Start menu
Group similar windows on the taskbar
Lock or unlock the taskbar
Organize Start menu
Restore Start menu defaults
Turn toolbars on the taskbar on or off
What happened to the Quick Launch toolbar?

Troubleshooting

Find and fix audio playback problems
Find and fix audio recording problems
Find and fix networking and connections problems
Find and fix printing problems
Find and fix problems
Find and fix problems with devices
Find and fix problems with homegroup
FInd and fix problems with transparency and other visual effects
Find and fix problems with Windows Search
Perform recommended maintenance tasks automatically
Record steps to reproduce a problem
Troubleshooting History

User Accounts

Add or remove user accounts
Change your account picture
Change your Windows password
Create a password reset disk
Create administrator account
Create an account
Create or remove account password
Create standard user account
Link online IDs
Make changes to accounts
Manage file encryption certificates
Manage network passwords
Turn guest account on or off

Windows CardSpace

Manage Information Card that are used to log on to online services

Windows Defender

Scan for spyware and other potentially unwanted software

Windows Firewall

Allow a program through Windows Firewall
Check firewall status
Memperbaiki Registry Yang Error

img

Glarysoft Registry Repair memiliki beberapa manfaat antara lain untuk membersihkan kesalahan dan error yang ada di registry windows seperti invalid path, invalid file associations, invalid file types, invalid custom controls, invalid application paths, invalid help paths, invalid fonts, invalid startup programs, invalid shared programs, obsolete software entries, dead file extensions, obsolete start menu order, adware dan spyware yang ketahuan menggunakan registry, serta error lain yang ditemukan di registry windows anda.
Seperti yang kita ketahui bersama, Windows memang rawan dengan adanya masalah di registry. Permasalahan dan error yang ada di registry jika dibiarkan menumpuk akan menyebabkan komputer windows menjadi lambat dan tidak stabil (sering terjadi crash).
Glarysoft menjamin bahwa penggunaan Glarysoft Registry Repair ini aman bagi komputer anda. Hal ini juga didukung dengan adanya fitur Restore Previuos Repair yang bisa anda gunakan untuk mengembalikan setting registry seperti semula jika setelah proses repair anda malah menemukan adanya error.
Beberapa keunggulan dari Glarysoft Registry Repair daripada software Registry repair lainnya adalah:
1. Gratis
2. Memiliki High Intelligent engine yang bisa menemukan registry entries yang error dengan cepat.
3. Memiliki hasil scanning yang cepat dan dilengkapi dengan report yang jelas.
4. Selalu membuat backup ketika mengubah registry yang error, sehingga anda bisa mengembalikan ke kondisi semula jika terjadi error lanjutan.
5. Mudah digunakan dan terbukti bisa meningkatkan performa serta stabilitas sistem operasi windows.
Bagi anda yang tertarik menggunakan Glarysoft Registry Repair untuk memperbaiki registry windows anda, anda bisa mendownloadnya secara gratis disini : glafysoft


Glarysoft Registry Repair ini bisa anda gunakan di komputer dengan sistem operasi windows 98, ME, NT, 2000, XP, 2003, Vista hingga windows 7. Dengan Glarysoft Registry Repair maka permasalahan kestabilan sistem yang rendah akibat banyaknya error di registry bisa diselesaikan dengan mudah.
Untuk menggunakan Glarysoft Registry Repair ini caranya sangat mudah. Setelah anda download dan install. Silahkan anda buka Glarysoft Registry Repair kemudian klik tombol Scan registry.

Hanya dalam waktu beberapa menit saja, maka Glarysoft Registry Repair akan menemukan error dan invalid entries yang ada di registry windows anda. Double klik di laporan error yang ditemukan jika anda ingin mengetahui detail error yang ada. Kemudian cukup klik Repair untuk memperbaiki semua error tersebut.

Kini registry anda telah bebas dari error.

repair windows xp tanpa memakai cd installation

Pertama-tama, yang harus dilakukan adalah Install Erunt software dan lakukan seperti yg ada pada gambar dibawah ini

1. Setelah proses backup selesai, copy folder (contoh:c:\windows\erdnt\01-05-2009) ke tempat yang aman atau gunakan winzip / winrar untuk backup folder tsb.

2. Posisi repair file windows ada di %SystemRoot%\repair gunakan windows explorer untuk membuka path tersebut

, kemudian copy semua file-file pada folder repair (autoexec.nt,config.nt,default,sam,secsetup.inf,security,setup.log,software,system,ntuser.dat)

ke folder contoh: c:\windows\erdnt\01-05-2009 (timpa semua file yang ada disana)

3. Lakukan seperti yg ada pada gambar dibawah ini

4. Reboot komputer anda. 
5. Selesai, OS telah di repair/perbaiki (dengan kondisi sama seperti pertama kali anda Install windows xp)

Ini berlaku tanpa ada masalah dengan XP tidak original, tapi jika XP anda original maka, siap-siap untuk renew activation windows.


Download Softwarenya : Erunt

Perang Dingin User Linux Dan Windows

Konflik antara Linux &  Windows

Oke, sebuah posting dengan judul yang rumit dan aneh. Disini, saya akan membahas apa yang menyebabkan konflik antara user windows dan linux beserta pemecahannya. Ada 2 golongan disini. Saya yakin bahwa user A akan berkata, “Ah, orang kurang kerjaan. Cuma bisa mbandingin windows dan linux. LOL!”. Sedangkan para user B akan berkata, “Hmm, apaan nih posting? Kayaknya penting untuk dibaca!”.
Ya, perkataan kedua user itu benar. Hanya saja kurang tepat. Terutama yang dikatakan user A, sangat-sangat kikuk. Tidak bisa membedakan kah anda antara kata “Pemecahan” dengan “Pembandingan”? Kalau saya punya uang, sudah pasti saya kirim lagi ke SD!
Baiklah, yang pertama, saya jelaskan SEKALI LAGI fakta-fakta sebenarnya tentang linux :
Penjelasan.
  1. Linux tidak sepenuhnya aman
    Ya, saya berani 100% berkata seperti ini. Windows sangatlah rawan dengan virus dan desktop-attack lainnya. Tapi lumayan aman dengan web-attack. Di linux, tidak ada yang namanya Virus. Yang ada hanyalah Rootkit. Rootkit hadir di beragam sistem operasi seperti, Linux, Solaris dan Microsoft Windows. Rootkit ini sering mengubah bagian dari sistem operasi dan juga menginstall dirinya sendiri sebagai driver atau modul kernel (dari wikipedia). Kalau linux benar-benar aman, buat apa ada kaspersky versi linux?
  2. Tidak semua distro Linux gratis
    Ya, tidak semua distro linux itu gratis. Misalnya, Red Hat Enterprise Linux (RHEL), dihargai sekitar satu juta sampai sepuluh juta rupiah! Tentu saja distro RHEL ini ditujukan untuk keperluan khusus, misalnya server, dll.
Tanya Jawab.
  1. T: Katanya Linux mahal ya? Harganya bisa sampai ratusan ribu ya?
    J: Iya, jika kamu membeli linux untuk keperluan server seperti RedHat Enterprise Linux. Selain itu, banyak distro linux gratis didownload, dan harga CD Linux pun hanya berkisar sekitar Rp5000-20.000saja.
  2. T : Beberapa orang mengatakan Linux itu susah dan hanya untuk keperluan bekerja. Benarkah itu?
    J : Iya, jika kamu menggunakan Linux yang Jadul. Sekarang, sudah banyak distro linux yang tampilannya lebih keren dari windows dan juga User-Friendly.
  3. T : Katanya Linux itu bisa membuat kita meng-hack linux itu sendiri karena kita otak-atik?
    J : Tidak. Cobalah definisikan kata “hack”. Memangnya user windows tidak pernah mengutak-atik windows itu sendiri?
  4. T : Kata teman saya, tampilan linux itu jelek dan tidak menarik. Benarkah?
    J : Salah! Coba anda cari screenshot Ubuntu 11.10. Jauh berbeda dengan windows yang cenderung terlihat monoton di semua versinya.
  5. T : Berapa rata-rata harga CD distro linux?
    J : Kalau anda minta CD-nya dikirim (misalnya kita beli di online-shop), tentu saja kita diminta membayar ongkos kirimnya. Tapi, kalau anda mendownload file .iso distro-nya, tinggal sediakan CD Kosong dan burn! Simpel kan?
Kenapa tidak disebutkan “Macintosh/Apple” disini? Kan sama-sama OS yang merajai dunia komputer?
Macintosh tidak diikutkan, karena hubungan Mac dengan Linux dan Windows saat ini relatif stabil.
Sekarang, kita bahas terlebih dahulu apa itu Windows & Linux. Windows, adalah salah satu OS, ya, OS. Sedangkan Linux sebenarnya adalah “kernel”. Kernel ibarat otak. Jadi, kernel adalah pengatur segala sesuatunya di suatu OS. Nah, para pengembang-pengembang Linux memanfaatkan kernel ini dan membuat tampilan GUI, sehingga tidak hanya berupa background hitam dan text putih seperti waktu dulu.
Salah satu yang membedakan Linux dan Windows ini adalah prinsip dan latar belakangnya. Windows memiliki prinsip closed-source dan memiliki latar belakang komersial di bawah naungan Microsoft. Closed-source ini artinya tidak membagikan kode sumber secara bebas. Sehingga orang yang ingin menjadi pengembang Windows harus bekerja untuk microsoft.
Bagaimana dengan linux? Linux memiliki prinsip open-source dan latar belakang non-komersial. Open-source disini adalah kebalikan closed-source, kode sumber boleh dibagikan secara bebas. Latar belakang non-komersial ini juga turut membuat perkembangan Linux menjadi sangat pesat. Ada beberapa hal yang perlu diingat, arti dari opensource adalah sebagai berikut :
  1. Bebas dikembangkan dengan cara apapun.
  2. Bebas digunakan semua orang.
  3. Bebas digunakan untuk kepentingan komersial dan pendidikan.
  4. Bebas didistribusikan dengan cara apapun. Term`suk dengan cara dijual.
Oke, sekarang kita akan menggunakan istilah “proprietary”, (dalam hal ini adalah Microsoft), dan OSS untuk Opensource Software.
Selain masalah salah kaprah tentang OSS yang berbayar dan gratis, ada lagi yang masih terlihat salah terhadap OSS yang lain, yaitu masalah penggunaan Open Source. Pertanyaan yang menimbulkan masalahnya adalah begini: “Kapan Anda menggunakan OSS?”.
Ternyata banyak yang masih bingung jawabnya. Ada yang beralasan gak bisa jawab karena masih menggunakan sistem operasi proprietary terkenal sejagad raya bernama Windows. Saya cuma bisa geleng-geleng kepala dan mengelus dada. Untuk kasus di atas mungkin kernelnya tidak open source. Tapi bisa saja aplikasi yang digunakan sehari2 adalah OSS.
Katakanlah ada Mister X yang merupakan pengguna setia Windows (genuine). Selain memanfaatkan Windows (operating system proprietary), Mister X adalah seorang pengembang aplikasi web. Dia menggunakan IIS (web server proprietary) sebagai toolsnya. Kemudian pada IIS-nya dia menanamkan PHP engine, menginstall dan mengkonfigurasi MySQL server agar bisa berjalan baik di komputernya. Untuk mengecek hasil desain aplikasi web nya, Mister X menggunakan Mozilla Firefox. Untuk contoh ini, maka kernel Windows Mister X emang bukan OSS. Source code kernel Windows tidak disediakan untuk publik secara bebas.
Web Server IIS Mister X juga tidak bisa dimodifikasi seenaknya, karena source codenya hak cipta Microsoft (Proprietary). MySQL Server Mister X adalah salah satu produk OSS. Kalo gak percaya anda bisa download source codenya di situsnya. Siapa tau sampean pengen ngembangin MySQL Server versi sendiri.
Dalam contoh ini, Mister X hanya sekedar memanfaatkan OSS. Tapi kan Firefox yang dipake Mister X juga produk OSS. Free pada OSS adalah free dalam arti “bebas”, bukan “gratis”. Lebih tepatnya bukan “Free” tapi “Freedom”. Karena tidak semua OSS dihargai nol rupiah alias gratis. Lagipula, tidak semua Proprietary Source juga berbayar. Ada juga yang nol rupiah alias freeware.
Alangkah bagusnya jika kita menggunakan OSS secara menyeluruh. Mulai dari pake kernel yang memang kode sumbernya terbuka seperti Linux atau BSD. Sampe aplikasinya juga OSS. Pengguna OSS ada dua jenis menurut saya, yaitu golongan yang memang butuh source code dari program lain untuk pengembangan softwarenya lebih lanjut. Serta golongan simpatisan OSS aja. Karena prinsip berbagi source code seperti berbagi jasa aja. Kalo ada orang lain yang ngasih source code secara cuma-cuma, maka rasanya “nggak enak” gitu kalo kita yang pengembang juga ga ngasih harga cuma-cuma juga.
Oke, back to topic. Intinya, kita tidak bisa menggunakan salah satu saja dari 2 OS ini. Bila anda memakai Windows, web yang anda kunjungi, 99,9% saya yakin serverwebnya adalah Linux. Jarang sekali ada web yang servernya windows, karena manja dan harus direstart ulang setiap harinya. Sedangkan server linux? Serverweb linux bisa berjalan 5 tahun tanpa manja dan tanpa minta direstart ulang.
Oh iya, sampai lupa, Apple juga turut serta dalam pengembangan komputer di jagad raya ini. Bebarapa distro linux, GUI-nya terinspirasi dari tampilan Macintosh. Tapi bukan berarti mencontek dan mengklaim-klaim lho ya… :P
Tidak hanya itu, Apple juga turut berpartisipasi untuk menaikan harga komputer di dunia ini. Hehehe… :)
Lalu, yang membuat Linux kurang populer? Ya, jam terbang alias waktu munculnya sudah dicuri start oleh Microsoft dan Apple. Jadi, ya wajar saja kalau terjadi adu mulut dan kemampuan di antara 2 user OS ini.
Perlu diingat, saya tidak membanding-bandingkan, hanya membahas masalah konflik ini saja.
Salam Open Source!

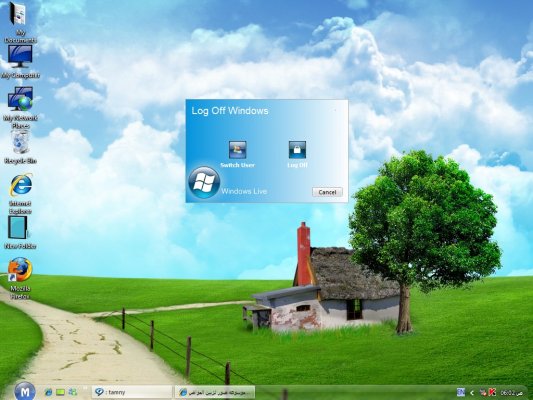
Windows XP AngeL Live 2.0 (2010)


Ok kali ini saya memberikan Xp yang luar biasa, Angel Live v.2.0, dari namanya sudah jelas banget nih, angel (malaikat) beuh sakti kali Xp ini, kenapa saya bilang seperti itu.... karena Xp ini sudah terintegrasi dengan beberapa software yang bisa dibilang ajib banget dehhh,

Integrated


  1. Internet Explorer 7
  2. Media Player 11
  3. Java 6
  4. Styler
  5. Windows Live Photo Gallery
  6. Microsoft SQL Server 2005 Compact Edition
  7. NET Framework 2.0 SP1
  8. Vista Souds
  9. Some Fonts
  10. RocketDock
  11. NewAero Cursors

Install With Choose


  1. Real Player 11 Final
  2. Fire Fox 3.0.2
  3. Flash Get 1.9.6
  4. nero 7
  5. WinRar 3.7
  6. Yahoo v.8
  7. K-Lite Codec Pack 4.1.7
  8. CCleaner v2.07.575
  9. Paint Dot Net V.3


Adapun Hardware yang dibutuhkan tidak lah terlalu besar bro, seperti ini


  • CPU : 800 Mhz or higher
  • RAM: 128 MB or higher
  • Pentium 3 or higher

ga banyak pejelasan langsung aja lihat screenshot nya......


Download Windows Angel Live 2.0 :

Cara Menambah Kecepatan Windows XP


Banyak cara yang bisa dilakukan untuk mempercepat kinerja pada windows xp. Bisa menggunakan software atau utak-atik registry. Pada tutorial ini, henpun-oprekerz akan mencoba berbagi cara mempercepat windows dengan penggabungan dari cara-cara yang lain.


This tutorial will help you in speeding up your system significantly.


1. Convert Your Hard Drive to NTFS


If your drive is using FAT16 or FAT32, you can gain performance by converting it to NTFS.


* Click on the Start
* Click Run
* Type cmd
* Enter
* Type CONVERT C: /FS:NTFS
* Enter


Follow the instructions and your drive will be converted to NTFS.


NOTE: NTFS drives can only be accessed by Windows 2000/NT/XP and Vista. Older versions of Windows are only compatible with FAT, FAT16 and FAT32.


2. Remove Malware from your System


Spyware comes bundled with a lot of free software found on the Internet. It can slow your machine down to a crawl. Download and install Spybot Search & Destroy , start your computer in Safe Mode and give your machine a full scan for spyware.


3. Disable Indexing Services


Indexing Services is a small little program that uses large amounts of RAM and can often make a computer endlessly loud and noisy. This system process indexes and updates lists of all the files that are on your computer. It does this so that when you do a search for something on your computer, it will search faster by scanning the index lists. If you don’t search your computer often, or even if you do search often, this system service is completely unnecessary.


To disable do the following:


* Click Start
* Click Settings
* Click Control Panel
* Double-click Add/Remove Programs
* Click the Add/Remove Window Components
* Uncheck the Indexing services
* Click Next
* Click OK


4. Reduce Visual Effects


Visual Effects can make Windows XP look good but displaying all the visual items can waste system resources.


* Click Start
* Right click My Computer
* Go to the Advanced tab in the Performance area
* Click Settings
* Choose "Adjust for best performance"


If you still want to keep the look of Windows XP, you can leave the last 3 check boxes selected. It is recommended that you do uncheck these boxes when installing a big or graphics heavy program (like the Adobe programs). Sometimes unchecking these will help rendering pictures, movies or listening music.


5. Speedup Folder Browsing


You may have noticed that everytime you open my computer to browse folders that there is a slight delay. This is because Windows XP automatically searches for network files and printers everytime you open Windows Explorer. To fix this and to increase browsing significantly:


* Open My Computer
* Click on Tools menu
* Click on Folder Options
* Click on the View tab
* Uncheck the Automatically search for network folders and printers check box
* Click Apply
* Click Ok
* Reboot your computer


6.Improve Swapfile Performance


It basically makes sure that your PC uses every last drop of memory (faster than swap file) before it starts using the swap file.


* Click Start
* Click Run
* Type msconfig
* Enter
* Click on the System.ini tab
* Expand the 386enh tab by clicking on the plus sign
* Click on new
* In the blank box type ConservativeSwapfileUsage=1
* Press Enter
* Restart your PC for the changes to take effect


7. Remove the Desktop Picture


Your desktop background consumes a fair amount of memory and can slow the loading time of your system. Removing it will improve performance.


* Right click on Desktop and select Properties
* Select the Desktop tab
* In the Background window select None
* Click Ok


8. Optimize Display Settings


Windows XP can look sexy but displaying all the visual items can waste system resources. To optimize the display settings:


* Click Start
* Click Settings
* Click Control Panel
* Double-click System
* Click Advanced tab
* In the Performance tab click Settings
* Leave only the following ticked:


1. Show shadows under menus
2. Show shadows under mouse pointer
3. Show translucent selection rectangle
4. Use drop shadows for icons labels on the desktop
5. Use visual styles on windows and buttons


9. Optimise Your Pagefile


If you give your pagefile a fixed size it saves the operating system from needing to resize the page file.


* Right click on My Computer and select Properties
* Select the Advanced tab
* Under Performance choose the Settings button
* Select the Advanced tab again and under Virtual Memory select Change
* Highlight the drive containing your page file and make the initial Size of the file the same as the Maximum Size of the file.


Windows XP sizes the page file to about 1.5X the amount of actual physical memory by default. While this is good for systems with smaller amounts of memory (under 512MB) it is unlikely that a typical XP desktop system will ever need 1.5 X 512MB or more of virtual memory. If you have less than 512MB of memory, leave the page file at its default size. If you have 512MB or more, change the ratio to 1:1 page file size to physical memory size.


10. Remove Fonts for Speed


Fonts, especially TrueType fonts, use quite a bit of system resources. For optimal performance, trim your fonts down to just those that you need to use on a daily basis and fonts that applications may require.


* Open Control Panel
* Open Fonts folder


Move fonts you don’t need to a temporary directory (e.g. C:\FONTBACKUP) just in case you need or want to bring a few of them back. The more fonts you uninstall, the more system resources you will gain.


11. Disable Services


* Click Start
* Click Run
* Type services.msc
* Enter


To turn off a service, double-click on it and select Disabled under Startup type.
For normal use, disable the following services:


* Alerter
* Background Intelligent Transfer Service
* ClipBook
* Computer Browser
* Error Reporting Service
* Help and Support
* Indexing Service
* IPSEC Services
* Messenger
* NetMeeting Remote Desktop Sharing
* Network DDE
* Network DDE DSDM
* Performance Logs and Alerts
* Portable Media Serial Number
* QOS RSVP
* Remote Desktop Help Session Manager
* Remote Registry
* Secondary Logon
* Server
* Smart Card
* Smart Card Helper
* SSDP Discovery Service
* System restore Service
* TCP/IP NetBIOS Helper
* Uninterruptible Power Supply
* Universal Plug and Play Device Host
* WebClient
* Windows time
* Wireless Zero Configuration
* WMI Performance Adapter


Before disabling any services, read the description. You might need it for proper functioning of your system.


12. Remove Unwanted Programs from Startup


* Click Start
* Click Run
* Type msconfig
* Enter
* Click on the Startup tab
* Uncheck any programs you dont want Windows to load at startup


Please be careful what you remove from here.If you don’t know what a particular program is do a Google search on the name of the process and then decide whether to keep it or not.


13. Remove Widgets and Background


Different third party widgets and visual styles like for Vista like look and feel make your system slow. If you remove such packages you system will perform better on CPU and memory intensive tasks. Selecting default and no wallpaper as background also gives better performance than that of "high quality" wallpapers.


14. Enable Direct Memory Access (DMA)


* Right Click My Computer
* Select properties
* Select the Hardware tab
* Click the Device Manager button
* Double click IDE/ATAPI controllers
* Keep on checking if DMA is enabled for each, you have to double click each option
* Click Advanced Settings tab. The tab may or may not be available for each option. It is only available in Primary and Secondary Channels.
* Set the transfer mode to "DMA if Available" both for Device 1 and 0
* Perform the same operation for other items in the list, if applicable.


15. Defragmentation


Defrag your disk drives twice a month for faster data access.


* Click Start
* All Programs
* Accessories
* System Tools
* Disk Defragmenter
* Select a drive and click ‘Defragment’


This will start the defragmentation process.


16. Update Windows


I recommend that you use Windows XP Service Pack 3, and update your computer using Windows Update to resolve known security and stability problems. This will give you a stable operating system that has been built to handle your system resources best. Also, make sure all your device drivers are up-to-date.


17. Disable Fast User Switching


* Click Start
* Click Run
* Type control userpasswords
* Enter
* In the User Accounts window, click on Change the way users log on or off
* Make sure the Use the Welcome screen option is ticked
* Uncheck Use Fast User Switching
* Click on Apply Options
* Close the window


18. Make Menus Load Faster


* Click Start
* Click Run
* Type regedit
* Enter
* Find HKEY_CURRENT_USER\Control Panel\Desktop
* Select MenuShowDelay
* Right click and select Modify
* Reduce the number to around 20, but not too less
* Close Registry Editor


19 Improve Boot Times


* Click Start
* Click Run
* Type regedit
* Enter
* Find HKEY_LOCAL_MACHINE\SOFTWARE\Microsoft\Dfrg\BootOpt imizeFunction
* Select Enable from the list on the right
* Right click on it and select Modify
* Change the value to Y to enable
* Enter
* Close Registry Editor


20. Improve Shutdown Speed


This tweak reduces the time XP waits before automatically closing any running programs when you give it the command to shutdown.


* Click Start
* Click Run
* Type regedit
* Enter
* Find HKEY_CURRENT_USER\Control Panel\Desktop
* Right click WaitToKillAppTimeout & Select Modify
* Change the value to 1000
* Enter
* Right click HungAppTimeout and Select Modify
* Change the value to 1000
* Enter
* Find HKEY_LOCAL_MACHINE\System\CurrentControlSet\Contro l
* Right click WaitToKillServiceTimeout and select Modify
* Change the value to 1000
* Enter
* Close Registry Editor

Merubah Tampilan Windows 7 Seperti Mac OS X Snow Leopard

Merubah Tampilan Windows 7 Seperti Mac OS X Snow Leopard ImagePada artikel terdahulu, kami pernah membahas bagaimana cara merubah tampilan XP seperti Windows 7 dan merubah tampilan Windows XP seperti Mac OS X. Kali ini kami akan memberikan tutorial bagaimana cara merubah tampilan Windows 7 agar seperti Mac OS X Snow leopard.
Perlu anda ketahui sebelumnya, pada saat melakukan percobaan kami menggunakan Windows 7 Professional version 6.1 Build 7600 dan berjalan dengan sempurna. Jika anda mengalami masalah ketika menggunakan trik ini, resiko anda tanggung sendiri. Pastikan anda faham bagaimana cara mengembalikan system Windows 7 jika terjadi hal yang tidak diinginkan ketika mencoba mengaplikasikan trik ini.
Berikut kami berikan step by step cara merubah tampilan Windows 7 seperti mac OS X Snow Leopard:
  • Download file Snow Transformation Pack di http://www.winxsoft.com/stp/download.html
  • Ekstrak file hasil download yang baru saja anda lakukan.
  • Install file Snow Transformation Pack 1.5.exe pada komputer, notebook atau netbook anda.
    Merubah Tampilan Windows 7 Seperti Mac OS X Snow Leopard Image
  • Jika ditanyakan apakah ingin menginstall semua (Completed), sesuai dengan kebutuhan minimal tanpa mengikutkan aplikasi 3rd-party (Performance) atau memilih sesuka anda (Customize) pilih Completed untuk memudahkan penggunaan.
  • Ikuti proses sampai selesai, kemudian restart system anda.
Setelah komputer restart, tampilan Windows 7 anda akan mirip[ dengan Mac OS X Snow Leopard. Coba lihat perbedaanya dengan klik tombol Rocket Docks yang ada di bawah, tombol Start yang berada di atas serta tampilan aplikasi yang berbeda dari Windows 7.
Merubah Tampilan Windows 7 Seperti Mac OS X Snow Leopard Image
Trik ini bisa menjadi alternatif bagi anda yang belum bisa memiliki Desktop PC atau Notebook dari Apple (Kita semua tahu harganya lebih mahal dari Notebook/desktop PC biasa) dan ingin merasakan penggunaan Snow Leopard Operating System.

FAQ

Q) Windows 7 yang saya pakai versi dan build berapa?
A) Baca artikel bagaimana cara mengetahui versi dan build dari Windows 7!
Q) Apakah trik ini bisa digunakan pada Windows 7 Starter?
A) Kami pernah mencoba dan belum berhasil. Kesimpulan kami sementara (Kesimpulan akhir seperti ini), aplikasi ini hanya bisa digunakan untuk Windows 7 Home Basic dan versi yang lebih tinggi.
Q) Saya telah menggunakannya pada Windows 7 Professional tetapi kenapa tampilan animasi tidak sebagus seperti pada contoh?
A) Kemungkinan anda secara sengaja atau tidak sengaja telah mematikan fitur Aero Graphical User Interface pada Windows 7. Coba aktifkan kembali fitur Aero fan ulangi lagi trik ini.
Q) Saya tidak menemukan pesan error saat mencoba trik ini tetapi kenapa tidak berhasil membuat Windows 7 di notebook seperti Mac OS X Snow Leopard?
A) Seperti yang kami jelaskan di awal, kami menggunakan Windows 7 Professional version 6.1 Build 7600 dan mungkin saja aplikasi ini belum sepenuhnya kompatibel dengan versi Windows yang anda gunakan.
Q) Saya ingin kembali menggunakan Windows 7 theme seperti sebelumnya, bagaimana caranya?
A) Sangat mudah, uninstall Transformations Pack melalui menu yang pada aplikasi itu sendiri atau Control Panel. Jangan lupa untuk me-restart komputer/notebook setelah melakukan uninstall program.
Q) Saya sudah coba langkah demi langkah, dan saya yakin tidak ada yang terlewat, tetapi kenapa belum berhasil juga?
A) Jelaskan kepada kami kronolgisnya dan tuliskan pada kotak komentar yang ada di bawah ini. Kami akan coba membantu anda.
Perlu diingat!
Secara teori, trik ini bisa digunakan pada semua versi Windows 7 Home Basic sampai yang lebih tinggi seperti Professional atau Ultimate Edition. Tetapi kami sendiri belum pernah mencobanya sendiri selain di Windows 7 Professional. Jika anda mengalami masalah ketika menggunakannya pada Windows lain, silahkan anda tanyakan di sini. Kami akan coba mencarikan solusinya untuk anda!
Update April 2011
Beberapa orang mengalami masalah ketika menggunakan aplikasi ini. Untuk itu, siaplah dengan semua resiko, termasuk layar notebook/komputer menjadi blank.
Selamat mencoba, semoga berhasil dan jangan lupa baca artikel menarik lainnya di NSC